Want to clean your driveway quickly and safely? Pressure washing is the way to go. It removes oil stains, dirt, and moss while protecting your driveway from long-term damage. Here's a quick rundown of the process:
- Clear the driveway: Remove vehicles, debris, and cover plants or outlets.
- Pre-treat stains: Use the right cleaner for oil, rust, algae, or other marks.
- Set up the pressure washer: Connect hoses, prime the pump, and check nozzles.
- Apply detergent: Start at the highest point and work in sections.
- Pressure wash: Use a 25° nozzle for even, effective cleaning.
- Rinse thoroughly: Remove all soap and grime, working from top to bottom.
- Dry and inspect: Let the driveway dry completely and check for missed spots.
Key tip: Always wear safety gear and test the pressure washer on a small area first to avoid damage. For stubborn stains or large driveways, consider hiring a professional service.
Pressure washing not only improves your driveway's appearance but also prevents costly repairs down the road. Follow these steps for the best results, and enjoy a clean, safe surface.
How to Properly Pressure Wash a Concrete Driveway
sbb-itb-238bf3c
Step 1: Clear and Prepare the Driveway
Before you fire up the pressure washer, take a moment to clear your driveway. Move vehicles, garbage cans, bikes, planters, and outdoor furniture out of the way. Why? Loose debris like stones or twigs can quickly become dangerous projectiles when hit by high-pressure water. As Zack Saadioui puts it, "Loose debris... can get in the way & turn into flying projectiles once you start spraying."
Once the area is cleared, focus on removing debris. A leaf blower or push broom works well for this step. Sweeping the surface first ensures small stones and dirt don’t turn into hazards and allows your cleaning solution to actually reach the driveway’s surface instead of sitting atop layers of dirt. Keep the driveway dry during this process to avoid creating mud or runoff issues.
Next, take precautions to protect your surroundings. Close all windows, doors, and garage openings, and cover nearby plants, bushes, and outlets with plastic sheeting secured with painter’s tape. Make sure to remove these covers promptly after cleaning.
When you’re ready to wash, start at the highest point of the driveway. This way, dirty water flows downward, keeping already-cleaned areas spotless. Proper preparation will make your pressure washing session much more effective.
Step 2: Pre-Treat Stains and Wet the Surface
Pre-treating stains is an essential step for achieving a clean, polished driveway. Start by inspecting the surface for trouble spots, such as oil and grease stains from vehicle leaks, rust marks caused by metal objects or fertilizers, algae and mold (those slippery green or black patches), and tire marks that leave dark streaks. Each type of stain may need a specific approach, so identifying these areas first will save you time and effort.
Before applying any cleaner, wet the entire driveway. This simple step helps the cleaner stick to the surface better. As Jimmy Graham explains, wetting the surface makes it more receptive to the cleaning solution and prevents it from drying out too quickly.
Here’s how to tackle common stains:
- Oil and grease stains: Spray a heavy-duty degreaser about 6 inches from the surface, then scrub with a stiff brush.
- Rust stains: Use a commercial rust remover for those reddish-brown marks.
- Algae and mold: Treat with diluted bleach or a specialized cleaner designed for these growths.
- Fresh oil spills: First, absorb the oil using clay-based kitty litter or sawdust. Let it sit for several hours before applying the cleaner.
After applying the cleaner, let it sit for 3–5 minutes to break down grime effectively. If you’re working on a large driveway or it’s a hot day, tackle the surface in 2–3-foot sections to prevent the cleaner from drying out before it does its job. If the cleaner starts to dry prematurely, lightly mist the area with a garden hose to keep it active.
Safety is key during this step. Wear goggles and gloves when handling chemicals, and protect nearby plants by covering them with plastic sheeting to avoid overspray damage. Once all stains are pre-treated and the cleaner has had time to work, you’re ready to set up your pressure washer for the deep clean.
Step 3: Set Up Your Pressure Washer
Once your driveway is ready, it’s time to set up your pressure washer. Start by connecting a garden hose (5/8-inch, no longer than 50 feet) to the water inlet on your machine. Before attaching it, let water run through the hose for 30–60 seconds to clear out any dirt or trapped air. Then, connect the pressure hose to the pump and the spray gun, making sure all fittings are tight to avoid leaks. Once everything is securely connected, you can move on to priming the pump.
To prime the pump and clear out any trapped air, turn the water supply on fully and pull the spray gun trigger for 30–60 seconds without turning on the machine. This step is crucial for preventing pump damage.
"Always ensure water is flowing before you start the machine to avoid burning the pump, especially important with gas models." – Frank, DIY expert
If you plan to use detergent, fill the washer’s detergent tank with a pressure-washer-safe cleaning solution or place the siphon tube directly into your detergent container. Attach the black (65°) nozzle, which is designed for soap application. Once the detergent is applied, switch to the green (25°) nozzle. This nozzle offers a good balance of pressure and coverage, making it ideal for cleaning standard concrete surfaces.
Before you dive in, test the pressure washer on a small, inconspicuous area of your driveway. Hold the nozzle 8–18 inches away from the surface and check for any signs of damage, such as pitting. If you notice issues, switch to a gentler nozzle like the white (40°) option.
For gas-powered models, double-check the oil and fuel levels before starting. For electric models, make sure to use a GFCI-protected outlet to stay safe when working in wet conditions. Once all safety checks and connections are complete, you’re ready to apply your cleaning solution.
Step 4: Apply Cleaning Solution
With your pressure washer equipped with the black 65° soap nozzle, start applying the cleaning solution from the highest point of your driveway. This method lets the detergent flow downward naturally, keeping the lower areas wet and preventing premature drying. Use steady, consistent strokes with the spray wand to ensure the solution spreads evenly.
Keep the spray wand 12–24 inches from the surface and move it in overlapping sweeps (about 6–8 inches of overlap) for thorough coverage . Working this way ensures no spots are missed and avoids uneven cleaning.
Tackle the driveway in small, manageable sections. If you notice the detergent drying too quickly, lightly mist the area again to keep it effective.
"Work in sections of two or three feet at a time so you can rinse the solution off before it starts to dry." – Pressurist
Once you've applied detergent to a section, let it sit for 5–15 minutes. This dwell time helps loosen dirt, grime, and oil, making them easier to remove. Just be cautious not to let the solution dry completely. Afterward, flush the pressure washer with clear water before switching to a high-pressure nozzle for rinsing. This step prevents reapplying soap during the rinse.
Step 5: Pressure Wash in Sections
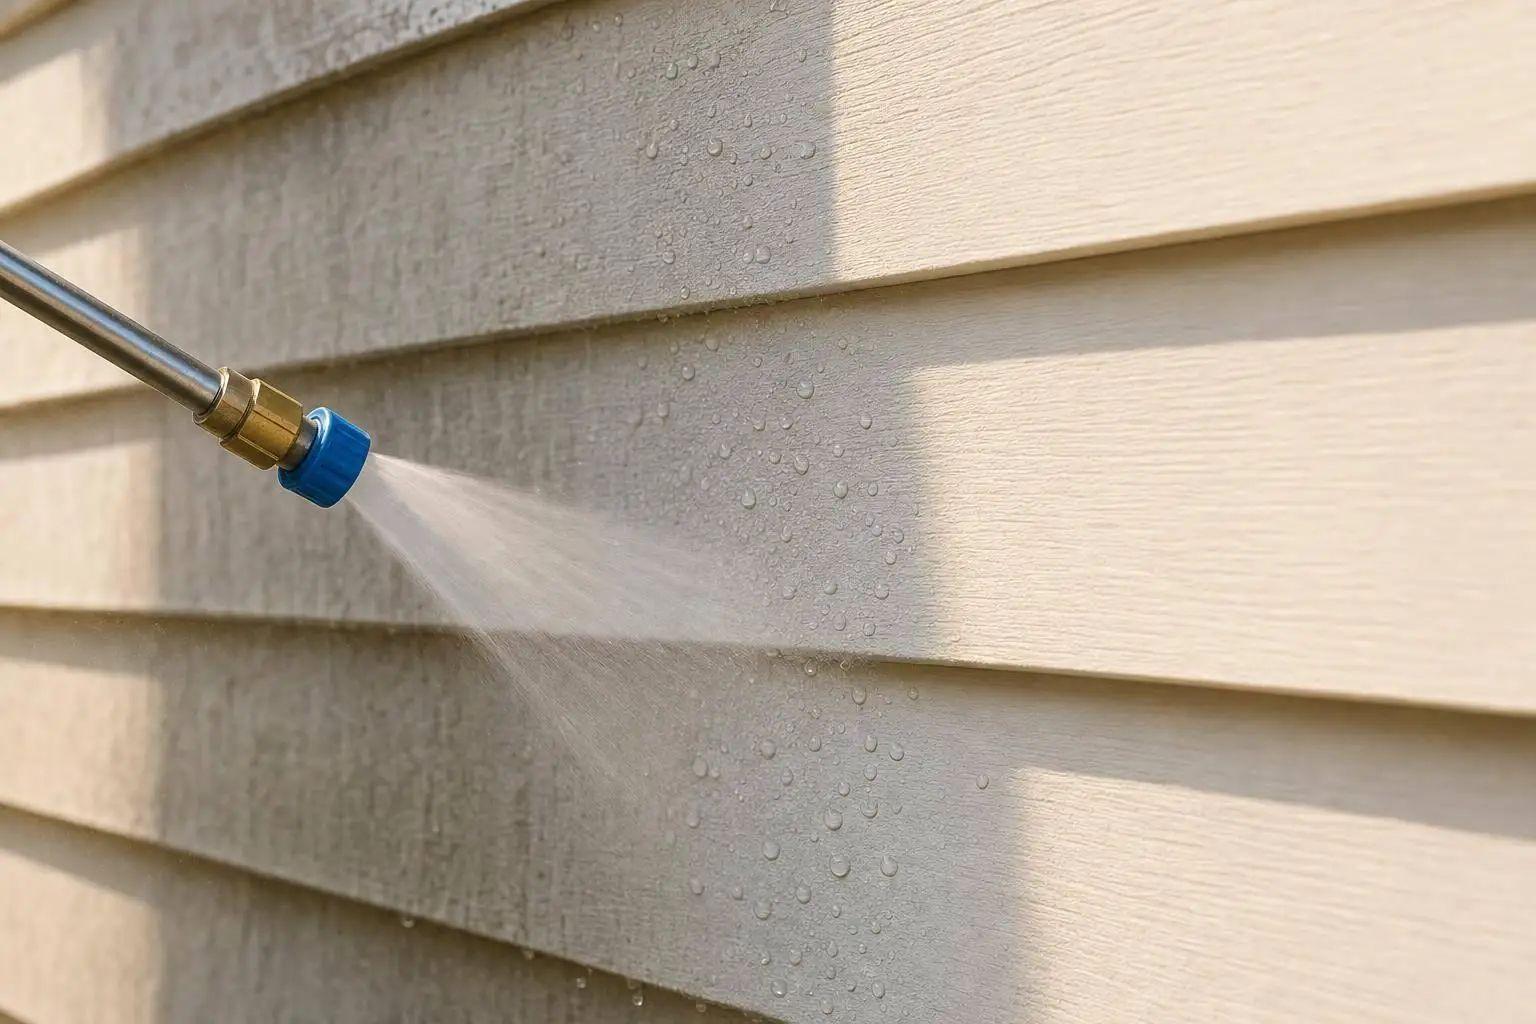
Now that the detergent has loosened the stains, it’s time to switch to the 25° (green) nozzle for pressure washing. This nozzle strikes a great balance between cleaning power and surface safety, making it perfect for concrete. Start at the highest point of your driveway - likely near the garage - and work your way downward. This way, the dirty water flows away from the areas you’ve already cleaned, ensuring a more thorough result.
Use steady, side-to-side sweeps, keeping the nozzle about 8–18 inches from the surface. Overlap each pass by 6–8 inches to avoid "zebra striping" and to ensure even cleaning. Keep the wand moving to prevent any damage like etching, cracking, or pitting.
For tougher stains, bring the nozzle closer - about 3–4 inches from the surface - and slow down your sweeps. To keep things manageable, divide the driveway into 2–3-foot sections. This prevents areas from drying out too quickly and ensures consistent cleaning.
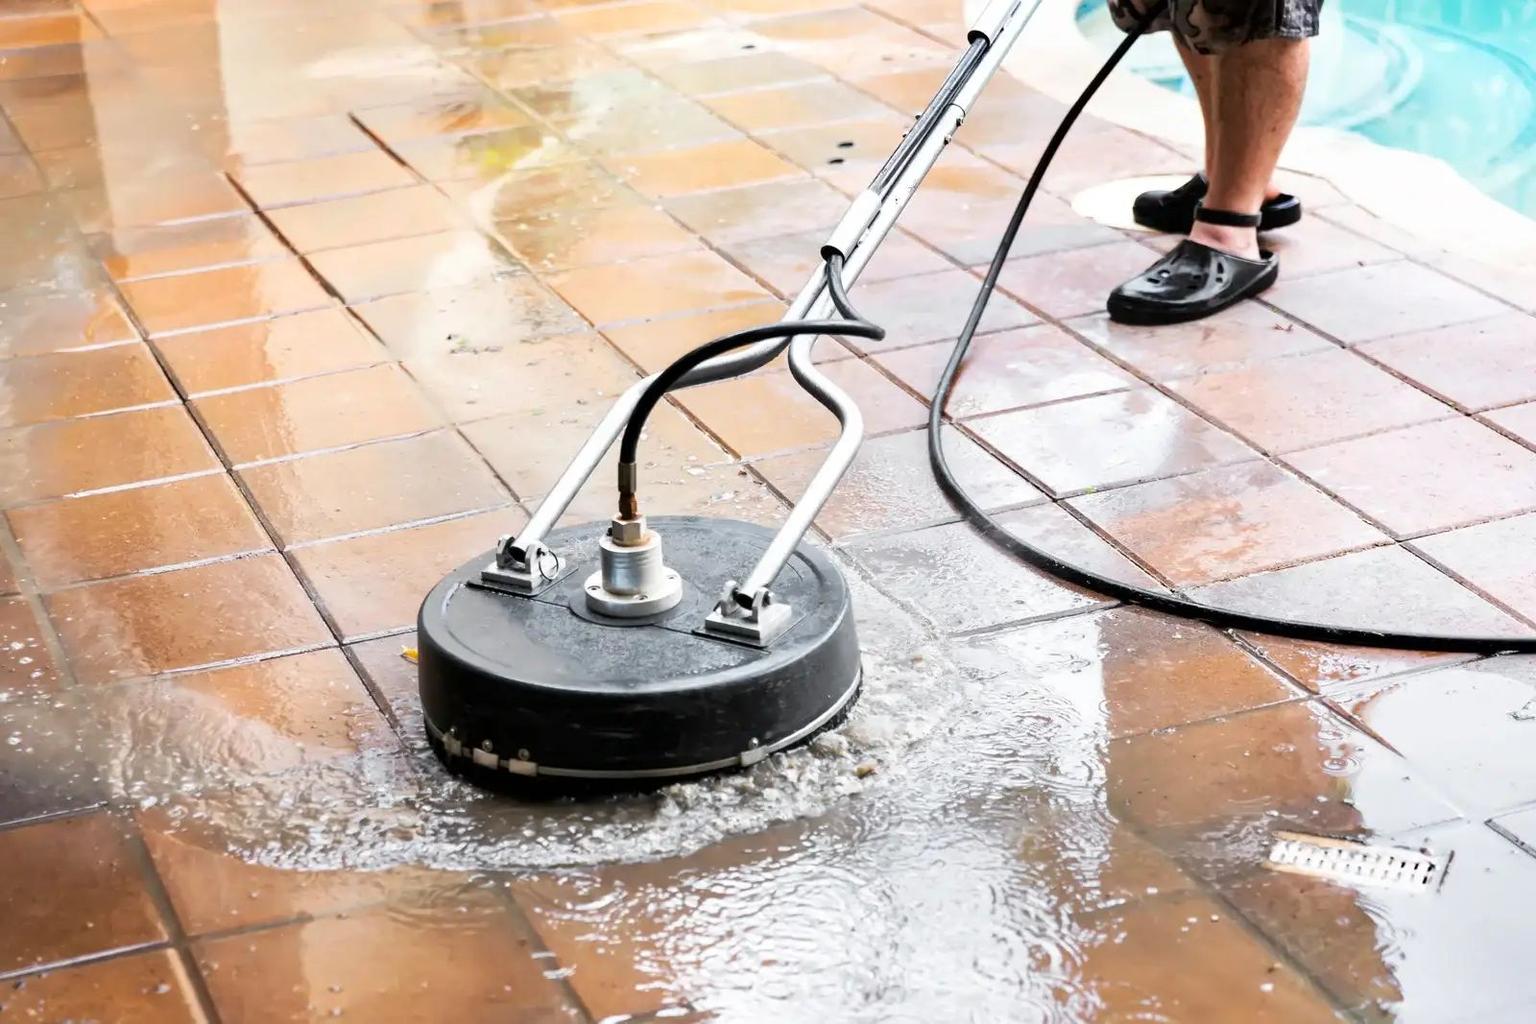
If you have access to a surface cleaner attachment, it’s worth using. This tool can make cleaning large, flat areas 3–5 times faster than a standard wand. The spinning arms with multiple nozzles create overlapping spray patterns, delivering a professional-grade finish without streaks. As Kevin Malcolm puts it: "My surface cleaner attachment... cuts the time in half and is more gentle than the wand. I've used it dozens of times and the results are always the same. A game changer!"
"Using a too-focused nozzle can crack or pit the concrete, so always use the right spray pattern." – Frank, DIY Expert
Whether you’re using a wand or a surface cleaner, the key is maintaining steady movement and keeping a consistent distance from the surface. This approach ensures an even clean while protecting your driveway from damage.
Step 6: Rinse Thoroughly
Once the detergent has done its job and the stains are loosened, it’s time to rinse your driveway thoroughly. After pressure washing, make sure all soap and grime are completely washed away. Start by flushing out any detergent left in your pressure washer. To do this, remove the detergent tube and run water through the machine until the spray comes out clear.
Next, attach the 25-degree (green) nozzle - this is the go-to option for rinsing concrete driveways. Begin rinsing at the highest point of your driveway, typically near the garage, and work your way downward toward the street. This method ensures that dirt, soap, and residue flow away from the areas you’ve already cleaned.
Use smooth, side-to-side strokes, overlapping each pass by about 6–8 inches. Hold the nozzle 8–18 inches away from the surface and angle it slightly to help push the detergent solution downhill more effectively.
Pay extra attention to cracks, corners, and tough stains where detergent might linger. For stubborn spots, bring the nozzle closer - around 3–4 inches from the surface - and slow your strokes. Keep the wand moving to avoid damaging the concrete. On especially hot days, work in smaller sections (2–3 feet at a time) to prevent the cleaning solution from drying before you can rinse it off.
"Starting at the highest point of your drive, begin rinsing away the concrete cleaner. Take your time and use the same method of intersecting strokes you used when applying the cleaning solution." – Jimmy Graham, Author
Finally, inspect the surface for any leftover soap or residue. Removing it now will help prevent streaks or film from forming as the driveway dries.
Step 7: Dry and Inspect the Surface
After completing the rinse, it’s time to let your driveway dry and check your work. Concrete typically takes about 24–48 hours to dry, while block paving may need 36–72 hours, depending on the weather.
To ensure the surface is fully dry before sealing, try the "Tape Test." Secure a plastic sheet to the driveway for an hour. If condensation forms underneath, the surface is still damp.
"Sealing too early risks trapping moisture, which can lead to peeling or discoloration." – PureSeal Services
Once the driveway is dry, carefully inspect the entire surface. Look for streaks, white spots, or any stubborn stains, especially along the edges and in corners. If you notice detergent residue, rinse those areas again to achieve a spotless finish.
Sealing is the next step to protect your driveway from stains, salt damage, and cracking. Hiring a professional service costs around $1.15 per square foot, or you can contact ViewCrew Services for expert maintenance. Proper drying and inspection lay the groundwork for effective sealing and long-term durability.
Pressure Washer Nozzle Comparison

Pressure Washer Nozzle Guide: Colors, Angles, and Best Uses for Driveway Cleaning
Picking the right nozzle is crucial - it can be the difference between achieving a spotless driveway or causing surface damage. Nozzle colors indicate spray angles, which directly affect how pressure is distributed. For most concrete or asphalt driveways, the 25° green nozzle is a safe starting point. It provides enough cleaning power without risking damage to the surface.
For tougher stains like grease or heavy mildew on concrete, the 15° yellow nozzle delivers a more focused spray. Just be careful - keeping the nozzle moving is key to avoiding surface etching or pitting. On the other hand, delicate surfaces like brick require the gentler 40° white nozzle, which protects against damage while still cleaning effectively.
"The trick with choosing the right pressure washer nozzle is to find the widest tip you can use that still cleans the surface effectively." – Clint DeBoer, Pro Tool Reviews
Avoid the 0° red nozzle for driveway cleaning. Its pinpoint stream is so intense it can crack concrete or even cause serious injuries. In fact, Consumer Reports advises against pressure washers that include this nozzle due to safety risks. Meanwhile, the 65° black nozzle is designed specifically for low-pressure tasks like applying soap or detergent before cleaning.
Here’s a quick reference table to help you choose the right nozzle:
| Nozzle Degree | Color | PSI Suitability | Best Use | Risks |
|---|---|---|---|---|
| 0° | Red | Very High | Spot cleaning rust or gum (not for driveways) | Severe etching, concrete cracking, and high injury risk |
| 15° | Yellow | High | Removing heavy mildew, grease, or stubborn stains on concrete | Can etch or pit concrete if held too close |
| 25° | Green | Medium | General cleaning of concrete and asphalt driveways | May leave streaks if strokes don’t overlap |
| 40° | White | Low | Cleaning brick, stone, or rinsing delicate surfaces | May not remove deep stains |
| 65° | Black | Low | Applying detergent or soap solutions | Offers no cleaning or rinsing power |
Before diving in, always test your nozzle on a small, hidden area and maintain a working distance of 8 to 18 inches from the surface. This helps prevent striping or erosion. If you’re tackling a large driveway, consider using a rotating surface cleaner attachment instead of a standard wand. It provides more even results and can cut cleaning time by up to 75%.
Match your nozzle choice to the type of surface and the severity of the stains. This approach helps protect your driveway while ensuring effective cleaning. Refer to this guide throughout the process for the best results.
Conclusion
Pressure washing your driveway doesn’t have to be complicated. By following these seven steps - clearing the area, pre-treating stains, setting up your equipment, applying the cleaning solution, washing in sections, rinsing thoroughly, and inspecting the results - you can achieve a polished look that boosts curb appeal and protects your driveway over time. Regular cleaning eliminates slippery moss and mildew, prevents oil and grease from breaking down concrete or asphalt, and keeps weeds from sprouting in cracks. Together, these actions help maintain a clean and durable surface.
Safety is key. Always wear protective gear and keep the nozzle 8 to 18 inches away from the driveway to avoid causing damage. Use the correct nozzle settings based on your driveway’s material for the best results.
For long-lasting maintenance, pressure wash your driveway once a year. After cleaning, be sure to let the surface dry completely (see Step 7) before applying a waterproof sealer. This extra step adds a layer of protection against future stains and weather-related wear.
If you’re dealing with a large driveway or stubborn stains, consider reaching out to ViewCrew Services. They provide professional pressure washing solutions throughout Massachusetts, Southern New Hampshire, and Connecticut. With insured technicians and industrial-grade tools, they deliver reliable, damage-free results - saving you time and effort while ensuring your driveway looks its best.
A clean driveway not only enhances your property’s value but also helps you avoid expensive repairs. Whether you decide to handle the job yourself or hire professionals, regular maintenance is a smart investment. Following the steps outlined above will keep your driveway in top condition and protect it for years to come.
FAQs
What PSI is safe for my driveway?
A pressure of 1,500 to 3,000 PSI is considered safe for pressure washing a driveway. This range provides enough force to clean effectively without causing damage to the surface. Before starting, it's a good idea to assess the material and condition of your driveway to make sure it can handle the pressure.
Should I use hot water or cold water?
Hot water is perfect for tackling tough stains like grease and oil. It seeps into surfaces and breaks down grime much more efficiently. On the other hand, cold water is great for everyday cleaning tasks, such as clearing away dirt and loose debris. When it comes to driveways, hot water is the go-to for stubborn stains, while cold water does the job for regular upkeep.
When should I seal after washing?
It's best to wait 24 to 48 hours after pressure washing before sealing your driveway. This waiting period ensures the surface is thoroughly dry, giving the sealant a chance to bond properly. Sealing too early can trap moisture beneath the surface, which might compromise the sealant's performance.