

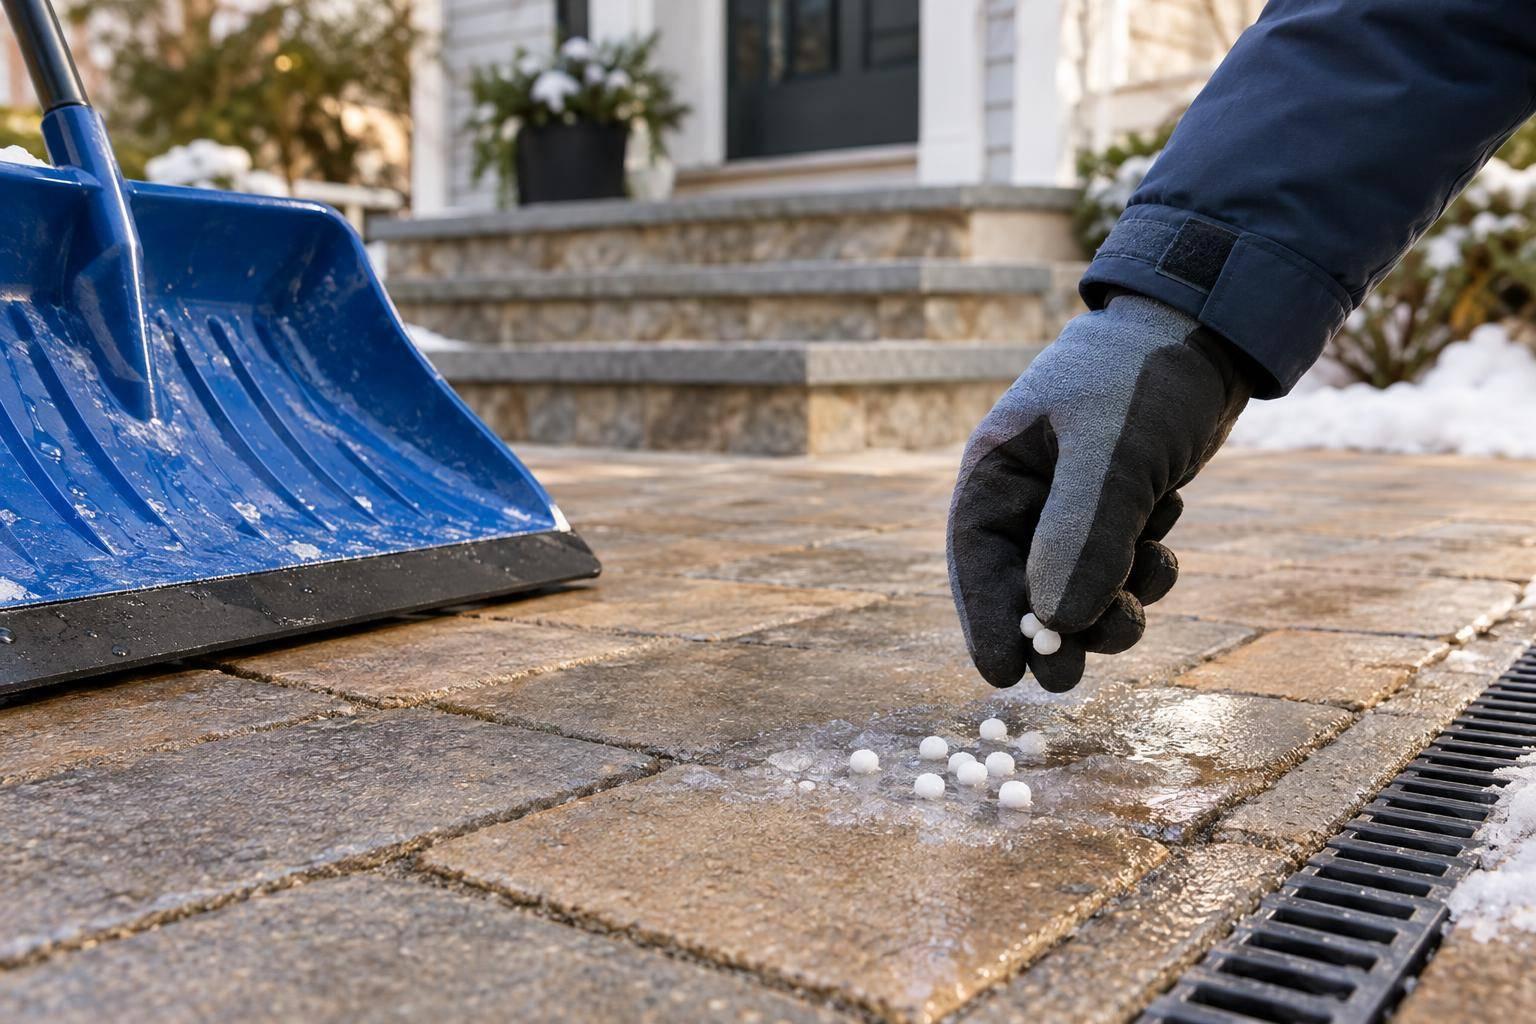
No ice melt is risk-free for your pavers - even when they’re sealed. For Massachusetts winters, shovel with a plastic blade first, then spot-treat leftover ice only with a de-icer your paver manufacturer allows. For some concrete pavers, sodium chloride is an option; Unilock says it works best above 16°F.
Your winter care plan should cover more than salt:
- Check the material: Concrete, clay brick, and natural stone need different care. Calcium chloride, magnesium chloride, and CMA can damage concrete.
- Choose traction carefully: Use clean sand on standard concrete pavers and matching jointing aggregate on permeable systems.
- Protect sealed and unsealed surfaces: Clear slush and chemical residue. Sealer does not prevent freeze-thaw damage.
- Keep water draining: Check joint sand, loose edges, and pooling. CMHA recommends at least a 2% surface slope, about 1/4 inch per foot.
- Inspect after snowmelt: Check white deposits, flaking, and uneven pavers. <u>Clean and repair before resealing.</u>
Start with your manufacturer’s care guide, then match your snow removal, de-icer, and spring cleanup to your pavers.
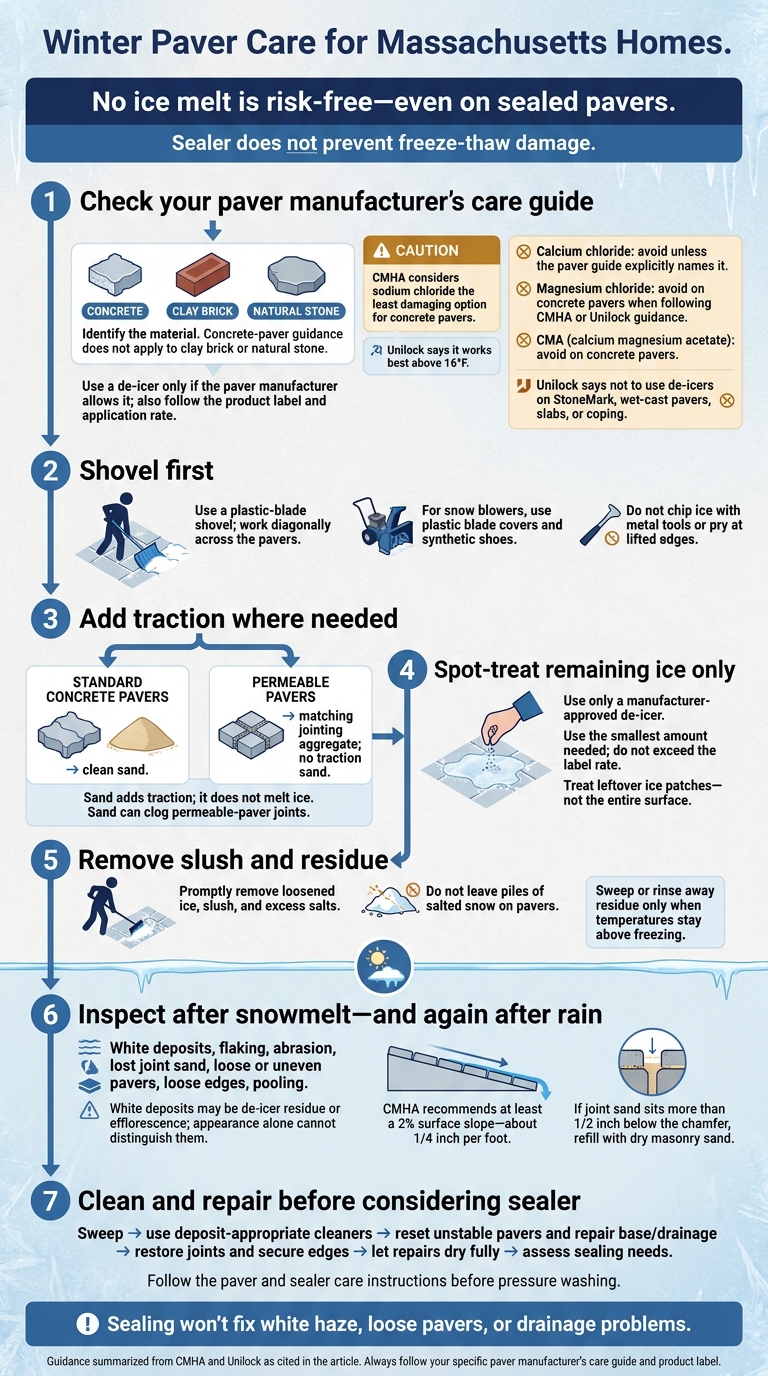
Winter Paver Care for Massachusetts Homes
Winter Tips: De-icing your Nicolock Pavers
sbb-itb-238bf3c
Choosing Ice Melt for Pavers
Use salt on pavers only if the manufacturer’s guide allows it. Salt is suitable for some concrete pavers, but not all. Winter damage can involve de-icers, water getting into the pavers, and freeze-thaw stress. CMHA considers sodium chloride the least damaging option for concrete pavers. Unilock says not to use de-icers on StoneMark, wet-cast pavers, slabs, or coping. Guidance for concrete pavers does not apply to clay brick or natural stone. Check the care guide for your material before using any de-icer.
Compare Ice Melt and Traction Materials
The active ingredient matters more than the brand name. Choose a de-icer based on your paver type, the product’s chemistry, and the temperature.
| Material | Concerns | Manufacturer guidance |
|---|---|---|
| Rock salt (sodium chloride) | CMHA considers it the least damaging option for concrete pavers. Unilock says it works best above 16°F. | Use only if the paver guide explicitly allows it. |
| Calcium chloride | CMHA cites research linking exposure to concrete mass loss and cracking. | Avoid unless the paver guide explicitly names it. |
| Magnesium chloride | CMHA and Unilock warn that it can chemically degrade concrete and damage its surface. | Avoid on concrete pavers when following CMHA or Unilock guidance. |
| CMA (calcium magnesium acetate) | CMHA does not recommend it for concrete pavers because it can chemically degrade concrete. | Avoid on concrete pavers. |
| Sand | Adds traction but does not melt ice. It can clog permeable-paver joints and reduce water infiltration. | Use clean sand on standard concrete pavers and matching jointing aggregate on permeable systems. |
Does Salt Damage Pavers?
Salt can contribute to damage, but it does not automatically destroy pavers. CMHA explains that water can enter concrete’s micro-voids, then freeze and expand. High-quality pavers made to ASTM C936 standards have low absorption and high density, which help them resist freeze-thaw damage.
CMHA’s testing shows why the de-icer matters. Sodium chloride caused only minor effects, while calcium chloride, magnesium chloride, and CMA caused greater mass loss and cracking.
Sealer changes surface protection, but it does not stop joint sand loss or freeze-thaw stress.
Protecting Sealed and Unsealed Pavers
What Sealer Can and Cannot Protect
A sealer can reduce stain penetration, but it cannot prevent freeze-thaw damage. Even on sealed pavers, winter damage usually starts in the joints and base.
| Surface condition | Remaining winter risks | Care priority |
|---|---|---|
| Sealed pavers | Scratches from shovels and scrapers, chemical exposure, and lost joint sand | Use plastic tools; clear slush and residue. |
| Unsealed pavers | Higher moisture absorption and deeper staining | Limit chemicals; keep water draining. |
| Permeable pavers | Traction sand can clog drainage joints | Skip sand for traction; protect drainage. |
Use plastic-edged tools, even if your pavers have a surface sealer. Sealer offers some protection, but drainage and joint sand play a larger role in how well pavers handle thaw cycles.
Joint Sand, Drainage, and Freeze-Thaw Damage
Winter runoff and snow removal can wash or push joint sand out of place. Poor drainage can also saturate the bedding layer, contributing to heaving or shifting. CMHA recommends a minimum 2% surface slope for drainage, or about 1/4 inch per foot. Pooling water, uneven pavers, and loose edges call for repairs - not another coat of sealer.
Fix joints and drainage before resealing. After the thaw, check for rocking pavers and loose edge restraints. Clean the surface, replace missing joint sand, reset uneven units, secure loose edge restraints, and correct drainage problems.
Winter care also means removing snow and limiting ice melt use.
Removing Snow and Applying Ice Melt
Once you know which de-icer your pavers can handle, follow a simple routine: shovel first, then spot-treat ice.
Shovel First With Plastic Blades
Use a plastic-blade shovel and work diagonally across the pavers. This keeps the blade from catching joint edges, as CMHA recommends. If you use a snow blower, fit it with plastic blade covers and synthetic shoes to prevent metal from touching the pavers. Never use the shovel to pry at lifted edges.
After shoveling, add traction material only where it’s slick: sand for standard pavers and jointing aggregate for permeable systems. Save de-icer for ice that remains after shoveling. This also helps keep salt and slush out of the joints.
Limit Ice Melt and Clear Residue
Before applying de-icer, check that both the paver guide and product label allow the product and application rate. Use the smallest amount needed, and treat only the remaining ice patches. Whether your pavers are sealed or unsealed, the goal is to limit wetting, keep joints clean, and use as little product as possible.
CMHA also recommends promptly removing loosened ice, slush, and excess salts. This helps prevent concentrated chemical buildup and limits moisture exposure during freeze-thaw cycles.
Do: Apply de-icer only where ice remains, then promptly shovel away loosened slush.
Avoid: Don’t exceed the label rate, chip ice with metal tools, or leave piles of salted snow on the pavers. Sweep or rinse away residue only when temperatures stay above freezing.
Spring Checks for Pavers
Look for Efflorescence, Lost Joint Sand, and Damage
Inspect pavers after snowmelt, then again after rain to spot pooling and settlement. Before cleaning or resealing, look for freeze-thaw stress and damage from de-icer exposure. Check edges, slopes, downspouts, and snow-storage areas for loose pavers, uneven edges, widened joints, flaking, abrasion, and white deposits. Inspect the base, drainage, and edge restraints, too.
White deposits could be de-icer residue or efflorescence - a mineral haze that forms when cement and water react. Appearance alone can’t tell you which one it is. If joint sand sits more than 1/2 inch below the chamfer, refill the joints with dry masonry sand.
Clean and Repair Before Sealing
Clean residue and stains in the right order. CMHA recommends sweeping in spring to remove winter sand and de-icing chemicals. Start with sweeping, then apply cleaners suited to each deposit or stain. Before pressure washing, follow the care instructions for both the pavers and sealer.
Reset unstable pavers, fix base or drainage problems, and restore the joints before sealing. Let repairs dry fully. Sealing won’t fix white haze, loose pavers, or drainage problems. This sealing preparation guide walks through the sequence.
Conclusion: Limit Chemicals and Inspect Each Spring
Follow the manufacturer’s cleanup guidance. Once inspection and repairs are complete, assess whether the pavers need sealing. Book a paver-sealing evaluation to determine whether cleaning, repairs, or sealing should come next.
FAQs
How do I choose ice melt if my paver type is unknown?
No ice melt is universally safe if you don’t know your paver type. Clear snow promptly with a plastic shovel or blade to cut down on chemical use.
If you need to de-ice, use the smallest amount required by the product label. For traction instead, consider clean, untreated sand.
What should I use when it’s too cold for rock salt?
Rock salt does little below 15°F. Calcium chloride works better in extreme cold, but it carries a higher risk of paver damage. For traction, choose sand, grit, or non-toxic abrasives first.
Before using a de-icer, check your paver manufacturer’s care guide. Apply only the amount needed, then promptly sweep away any excess once the ice clears.
How can I tell if winter damage needs repair or resealing?
Once your pavers have fully thawed and dried, check for rocking or tilted pavers, pooling water, open joints, missing or displaced joint sand, new chips, surface scaling, loose edge restraints, and white deposits that won’t go away.
Rocking, tilting, or pooling water may point to drainage or base problems. Assess these issues before pressure washing or resealing. Cleaning and a new coat of sealer won’t fix structural damage.


