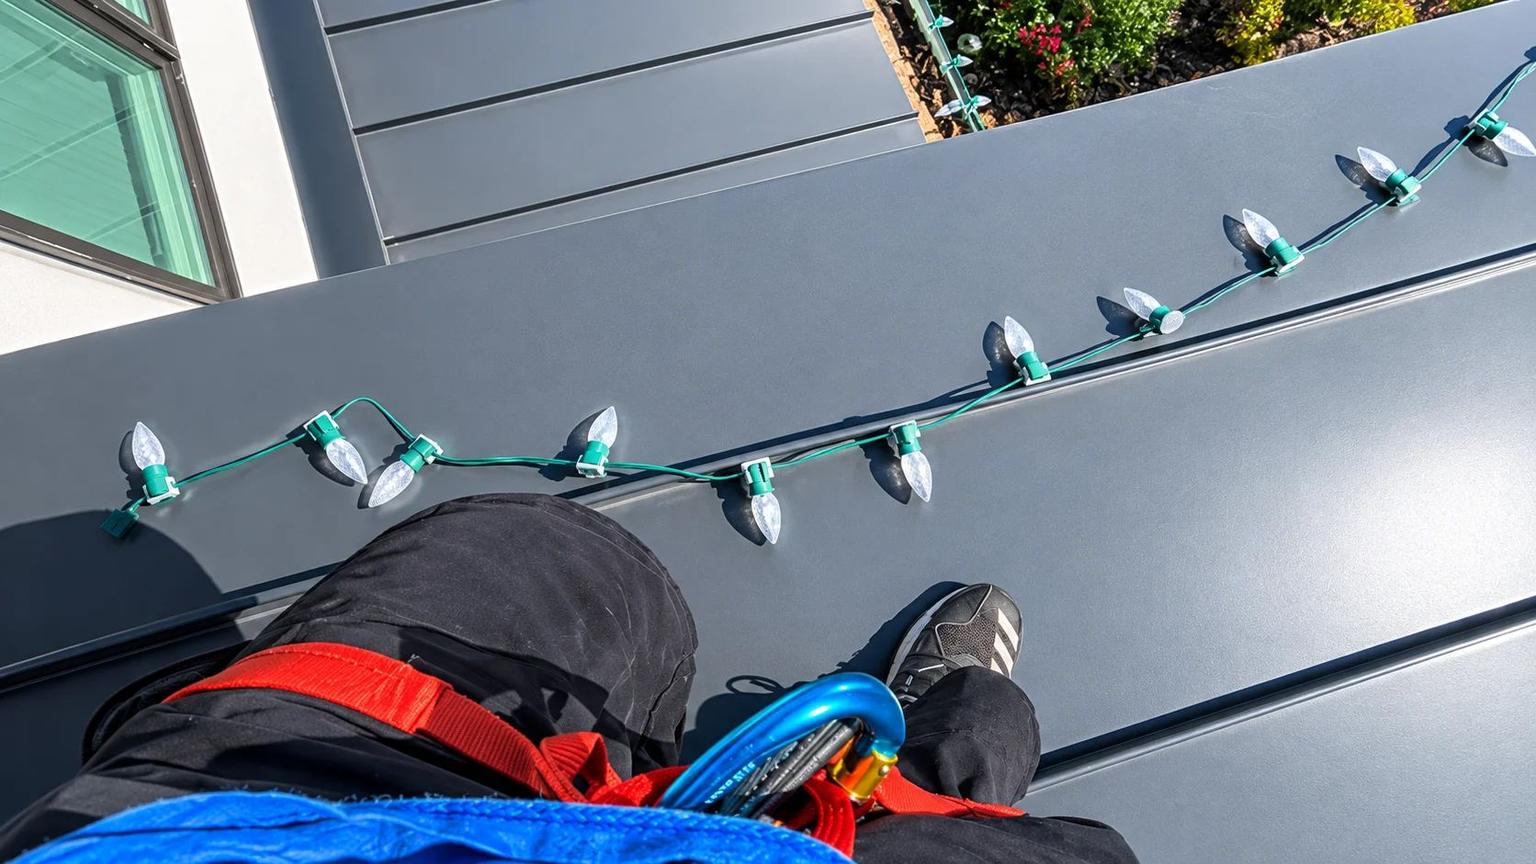
Yes - you can hang Christmas lights on a metal roof without drilling holes. The safest setup is to use no-drill fasteners that match your roof type, install only in dry weather above 32°F, and stay off steep or icy roof sections.
You want three things from this job:
- No roof damage
- No loose lights in snow or wind
- No unsafe ladder or roof work
Here’s the short answer:
- Use standing seam clamps on raised-seam metal roofs
- Use adhesive clips on gutters or trim edges, not roof panels
- Use magnetic clips on steel panels for straight runs
- Use LED lights and outdoor-rated cords
- Check the setup after snow, ice, or high wind
- If the roof is steep, slick, or high, hire a professional installation service
In New England, winter weather is the main problem. Ice, sliding snow, and freeze-thaw swings can loosen clips and turn metal slick fast. Falls are one of the top holiday decorating risks, and the U.S. Consumer Product Safety Commission has long reported thousands of decorating injuries each year tied to ladders and falls.
How To Install Christmas Lights on a Metal Roof Like a Pro
sbb-itb-238bf3c
Quick Comparison
| Method | Best For | Drill Needed | Main Risk | Best Tip |
|---|---|---|---|---|
| Standing seam clamps | Standing seam roofs | No | Wrong clamp fit can slip | Match the clamp to the seam shape |
| Adhesive clips | Gutters and trim edges | No | Cold or wet surfaces can weaken grip | Apply only on clean, dry surfaces above 32°F |
| Magnetic clips | Steel panels | No | Snow or ice can shift them | Use for straight runs and recheck after storms |
Bottom line: if you match the fastener to the roof, use light-weight LEDs, and avoid wet or freezing install days, your lights are far more likely to stay in place through the season. The rest of this guide walks through what to use, how to set it up, and when to stop and call for help.
Choose the right attachment method for your metal roof
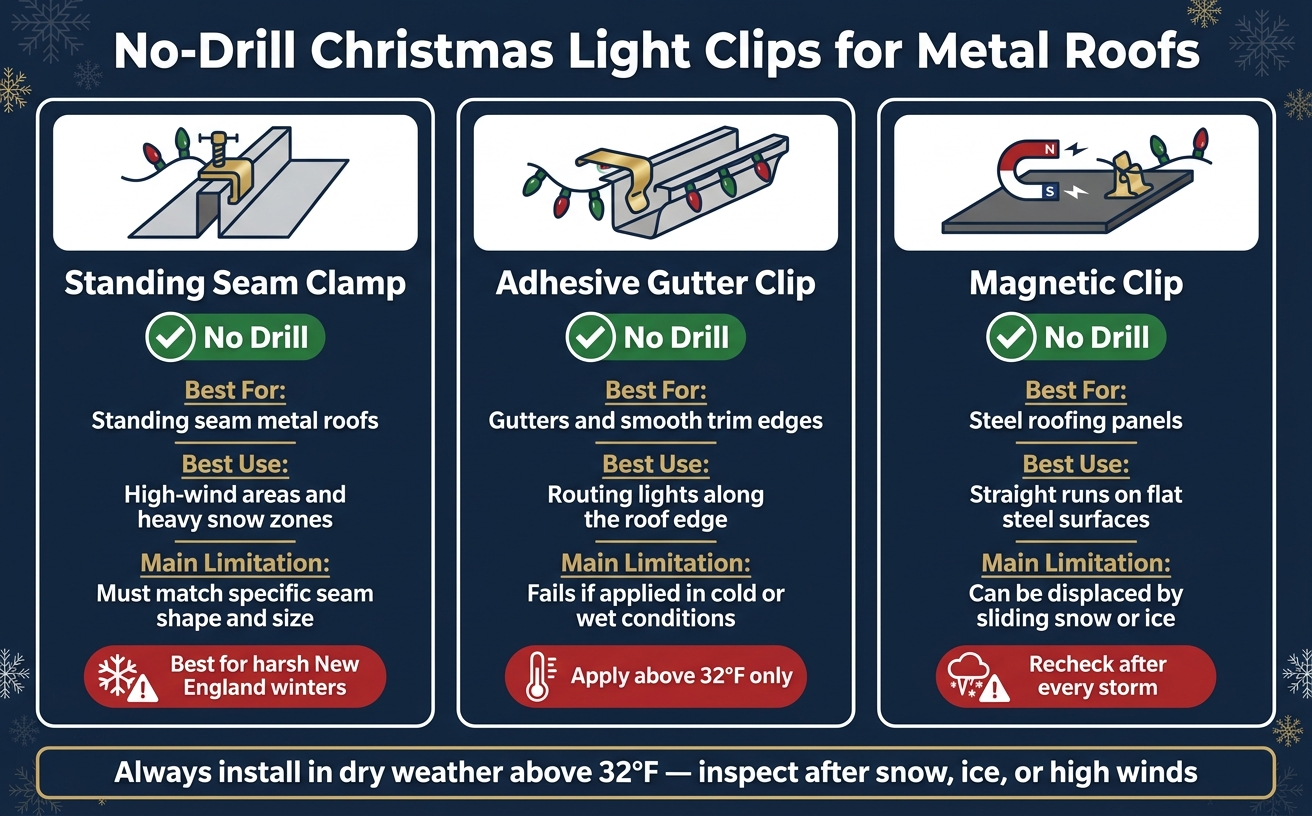
Christmas Lights on Metal Roofs: No-Drill Clip Comparison Guide
Pick clips based on your roof surface, seam shape, and how harsh winter gets on your home. In New England, the weak spots are usually the same: wind, sliding snow, ice, and repeated freeze-thaw swings.
Standing seam clamps for raised-seam metal roofs
Standing seam clamps lock onto the raised rib of the panel mechanically. That means no adhesive and no punctures. The catch is fit: the clamp has to match the seam profile exactly. Even a small mismatch can lead to wobble or sliding when wind and snow load build up.
Adhesive gutter clips for roof edges and gutter lines
At the roof edge, use clips made for gutters and trim, not the roof panel. Put them on only when the surface is clean and dry and the temperature is above freezing. A dry stretch in late fall is ideal. If you apply them in cold or damp weather, freeze-thaw cycles can weaken the bond, and expanding ice can pull the clips loose.
Magnetic clips for steel roofing panels
Magnetic clips give you a non-permanent way to attach lights to flat steel panels. They're a good fit for straight runs and simple layouts. But they do have a weak point: sliding snow and ice can knock them out of place.
Here's a quick side-by-side look:
| Clip Type | Roof Compatibility | Drilling Needed? | Best Use | Main Limitation |
|---|---|---|---|---|
| Standing Seam Clamp | Standing seam metal roofs | No | High-wind areas and heavy snow zones | Must match specific seam shape and size |
| Adhesive Gutter Clip | Gutters and smooth trim edges | No | Routing lights along the roof edge | Fails if applied in cold or wet conditions |
| Magnetic Clip | Steel roofing panels | No | Straight runs on flat steel surfaces | Can be displaced by sliding snow or ice |
Once you've chosen the clip type, get your LED lights and cold-weather gear ready before you climb. After that, it's time to prep your lights, cords, and ladder footing for cold-weather installation.
Gather materials and prepare for cold-weather safety
Once you've picked the right clip type, get the rest of your gear ready before you head outside. Your lights and accessories should fit the clips you chose, so everything works together from the start.
Use LED lights and outdoor-rated power accessories
Go with LED strands. They weigh less, which means less pull on your clips and clamps.
Use outdoor-rated extension cords and timers made for cold weather. Also, keep every connection protected from moisture.
Here’s what to have ready before you start:
| Item | Why It Matters |
|---|---|
| LED Christmas light strands | Lighter weight puts less strain on clips and clamps |
| Outdoor-rated extension cords | Designed to withstand moisture and cold weather |
| Weatherproof connectors | Help reduce electrical issues at junction points |
| Outdoor timer | Lets you manage the display without repeated manual adjustments |
| Clips or clamps matched to your roof type | Match the attachment method to your roof surface |
Once your gear is set, check the weather and take a close look at the roof surface before setup.
Check weather, ladder placement, and roof surface and edge conditions before you start
Metal roofs get slippery fast. In New England, freeze-thaw cycles can also leave ice on metal surfaces that’s hard to spot. Do not install in wet, icy, windy, or freezing conditions. Frost can make clip adhesion unreliable and ladder placement unsafe.
Take a minute to check ladder footing, roof edges, and the surface itself. If anything looks slick or unstable, don’t push it.
When to stop and call a professional
If the roofline is too steep or too exposed, stop there. If the roof is steep, high, or slick, hire a professional installer with fall-protection gear.
How to install lights on a metal roof without drilling
Once the roof is dry and the ladder feels solid, the job breaks into three parts: map the run, attach the clips, and secure the cords.
Inspect the roofline, measure runs, and plan attachment points
Start by checking the full roofline from end to end. Pick the areas you want to light, which usually means the eave edge, gutter line, or the raised seams on a standing seam roof. Before you do anything else, make sure you know what kind of metal roof you have. The wrong clip won’t stay put in New England weather.
Measure the full run, then write down the total length. From there, plan your attachment points so they’re spaced evenly. That small bit of planning makes a big difference. From the street, a straight, even line looks much better than one with odd gaps or dips.
Attach clamps or clips to match the surface
This is the part where the roof type matters most. If you have a standing seam roof, slide the clamps onto the raised seams and tighten them in place. If you’re working along a gutter edge, clean and dry the gutter lip first, then press each clip into place. On steel panels that work with magnets, press each magnet down and test the hold before moving on.
Don’t rush this step. A clip that seems fine at first can shift once the cord has weight on it.
Hang the strands, secure excess cord, and test the display
Start at the outlet end and feed the lights into the clips. Move in one direction along the roofline so the strand stays taut and the spacing stays even. Keep the run tight, but not strained. If there’s too much slack, the cord can flap in the wind and pull clips loose.
Tie down any extra cord so it doesn’t swing around. Once the full run is up, plug in the display, step back, and look at the whole line. If you spot sagging sections or loose areas, fix them now.
Post-installation checks for snow, ice, and freeze-thaw conditions
The job isn't done just because the lights turn on. After snow, ice, or strong wind, check the display again.
Check grip, alignment, and cord placement
Once the lights are installed, inspect them after every major storm. Look along the roofline and at each attachment point to make sure the strand is still straight and that no section has drooped or shifted. Pay close attention to cords near roof edges, gutter lines, and other exposed areas.
If a clip has come loose, re-seat it before the next storm.
Keep cords and light strands out of snow and ice runoff paths. That helps reduce stress on the fasteners and lowers the risk of ice-related hazards near edges, gutters, and walkways.
If anything moves out of place, fix it before the next freeze.
Conclusion: Use the right clips, protect the roof, and put safety first
No-drill methods, standing seam clamps, adhesive gutter clips, and magnetic clips, protect the roof surface and hold through the season when the clip matches the roof type. Check the setup after major storms, since wind, ice, and heavy snow can work even a well-matched clip loose.
Metal roofs add their own risk on top of the usual holiday lighting hazards. The surface turns slick fast in rain, frost, or morning dew, and a steep pitch leaves little margin if a foot slips.
Call a professional if the roof is steep, icy, or hard to reach. A crew that installs Christmas lights for a living, such as ViewCrew Services, carries the right harnesses and ladders for the job and knows which clip actually holds on standing seam versus corrugated panels.
FAQs
How do I tell what type of metal roof I have?
Check the roof’s main features first. A standing seam metal roof has raised vertical ribs that run from the ridge down to the eave. Those ribs can support non-penetrating clamps.
If you see flat panels with exposed fasteners or shingles, you’re dealing with a different roofing system. And because ladder work on metal roofs can be risky, especially in New England, it’s safest to have a professional confirm your roof type.
How often should I check the lights during winter?
Check your holiday lights from time to time during the winter to make sure they stay in place and keep working the way they should.
Since metal roofs can get slick and risky during New England winters, it’s best to inspect everything from the ground whenever you can. If you spot loose clips, sagging strands, or lights that aren’t working, call a professional to handle the fix.
When is it safer to hire a pro?
It’s safer to hire a professional for holiday lighting installation on a metal roof because the job involves slippery, elevated surfaces and serious safety risks.
A trained, insured expert has the right equipment and hands-on experience to secure attachments safely and correctly while helping prevent personal injury and accidental property damage.